
Whilst the same as the batch send process, when you send to a single email address, the vSure system allows you to add additional information against the candidate/employee/contractor including Employee ID, Start Date, Location and Group (which are not accessible when you send to multiple email addresses simultaneously).
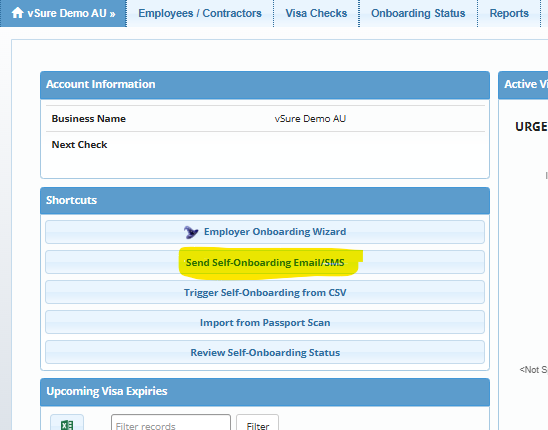
1. From the Dashboard Shortcuts, Select "Send Self-Onboarding Email(s)"
2. Enter the email address
You can simply add email addresses OR names with the email addresses between <>, as below.
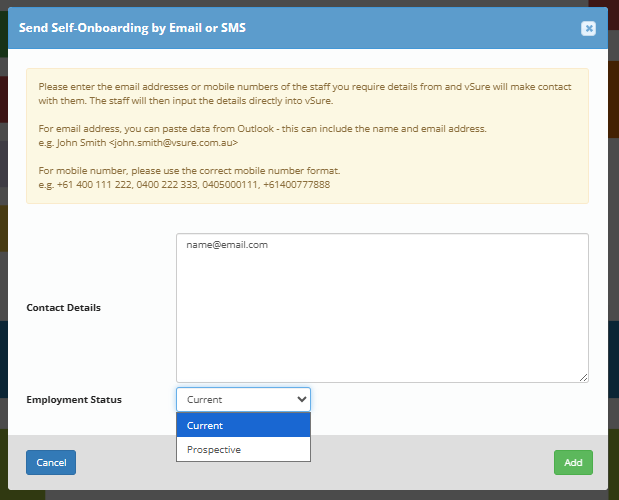
3. Specify if you are checking a current or Prospective employee
If you are checking a candidate's work rights pre-employment, select prospective Employment Status.
If you intend to employ this person or HAVE employed this person, select Current Employment Status.
4. Click Add
5.The system will check if this is an existing email address and flag if it is a Duplicate
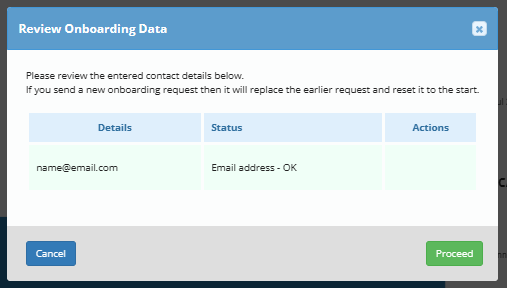
The system checks whether the email address already exists in the system and prompts you to either send or not send the duplicate request.
6. When you are happy, click Proceed
This is where the individual send varies from a batch send to multiple. If there is only one email address vSure will allow you to optionally add additional details against the candidate / Employee / Contractor:
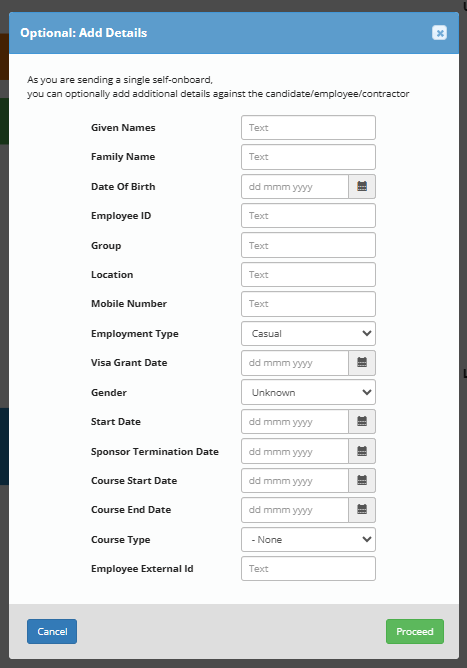
When ready hit Send:
7. Edit the email
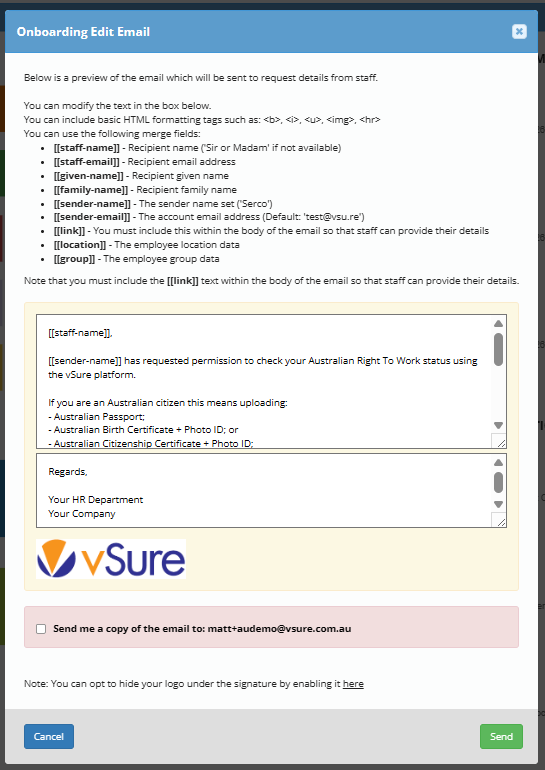
8. Edit email signature
9. Choose whether you want a copy of the email
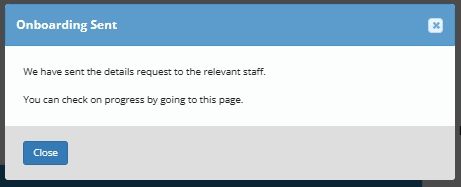
10. Send
11. Close
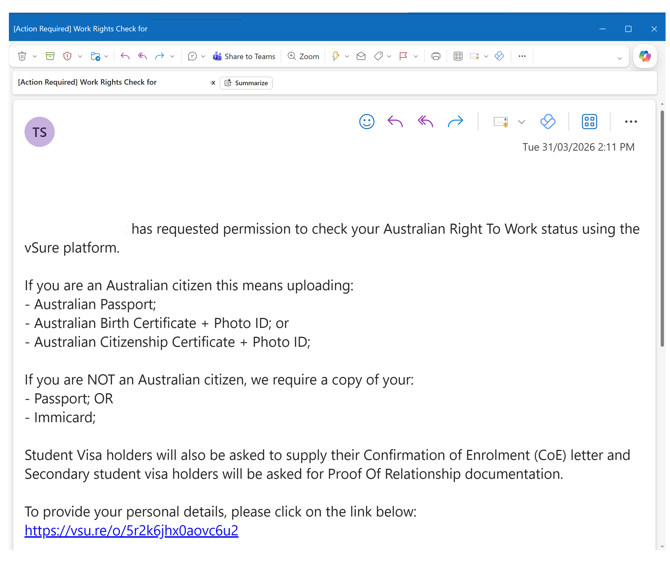
The Candidate/Employee/Contractor will then receive an email requesting them to supply proof of Work Rights documents. Your company name will replaces the text "vsuredemo1" in the email below:
12. Review Self-Onboarding
There is still a legal requirement to "sight" the identity documents and we offer a smart workflow to do this via the Onboarding Status tab:
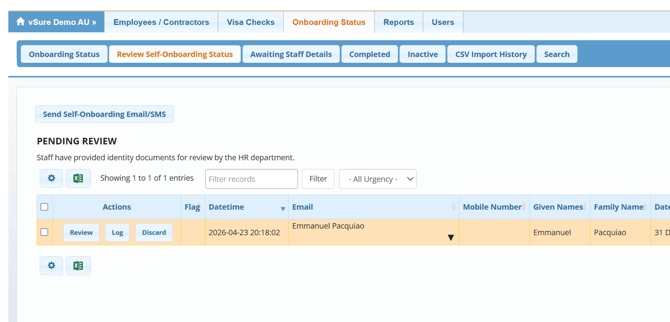
It is important to regularly go to the "PENDING REVIEW" section to review any onboards that have been complete. Simply click on the row to view (and approve or reject) the documents submitted.
The Flag represents data cross-matching and machine learning validation. An onboard submission will flag when there are discrepancies, such as:
- The details (name and DOB) submitted by the employee vary from the details obtained from the image/photo of the identity document including passport;
- The name against the visa returned from home affairs does not exactly match the name submitted;
- Our machine learning image recognition system, returns a confidence percentage as to whether the document image is what it is expected to be (Passport, Photo ID etc) - it will flag if the confidence is below the threshold percentage (which will improve over time -currently 75%).
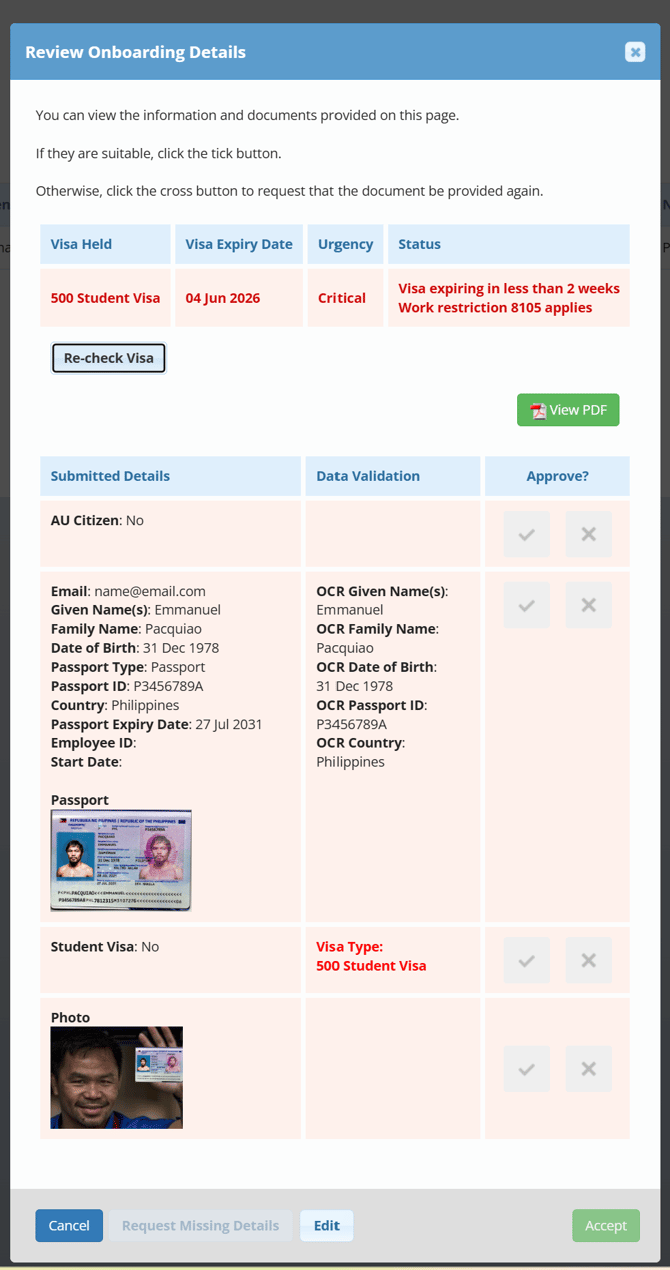
Tick to accept the image/document and acknowledge it in the system as "sighted".
Select the X to reject the document (you can resend a request for the rejected document by clicking the "Request Missing Details By Email" button at the bottom.